
Form - Lab 3
- Jack Plantz
- Mar 22, 2019
- 4 min read
Updated: Apr 14, 2019
After learning about unrolling techniques in rhino, I realized that I really like the aesthetic of reduced meshes. The triangles seem like they are arranged in a somewhat random position, but they all intersect to create a close approximation of a specific form. I knew for this project I wanted to take some kind of simple form and recreate it with this type of interesting geometry. I eventually decided on a bowl. I went with a large bowl, intended to hold fruit or something. I wanted it to be big enough to make the individual triangles easy to fold and glue together, and also to make the lines between triangles clean, crisp and easy to see. Here is my final result:

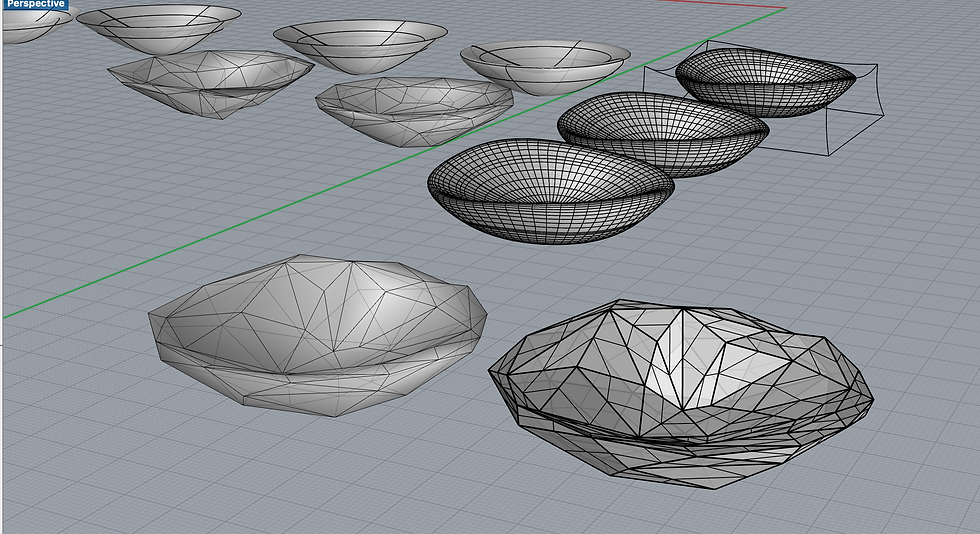
I started in rhino, creating various cross sections of bowls. I experimented for a long time with each design, manipulating control points until I had a result that I liked. I made four separate designs, then revolved each of them around their center axis to produce 3 dimensional bowls.
I eventually picked one to continue forward, it had more a more rounded edge on the lip of the bowl, and was thicker overall. I figured this would help me when it came time to assemble it.

I wanted the bowl to be a little bit irregular so the the geometry of the mesh triangles would be different across different parts of the bowl. I achieved this by cage editing copies of the bowl. I raised two corners of the cage to give it a kind of natural, hand sculpted look. I would test these cage edits by using the mesh and mesh reduce tools to get a sense of what the final product would look like.

I experimented with different numbers of polygons in the bowl. I wanted to strike a balance between preserving the shape (and function) of the bowl, while making it as edgy and geometric as possible. This is the final design I decided to build.
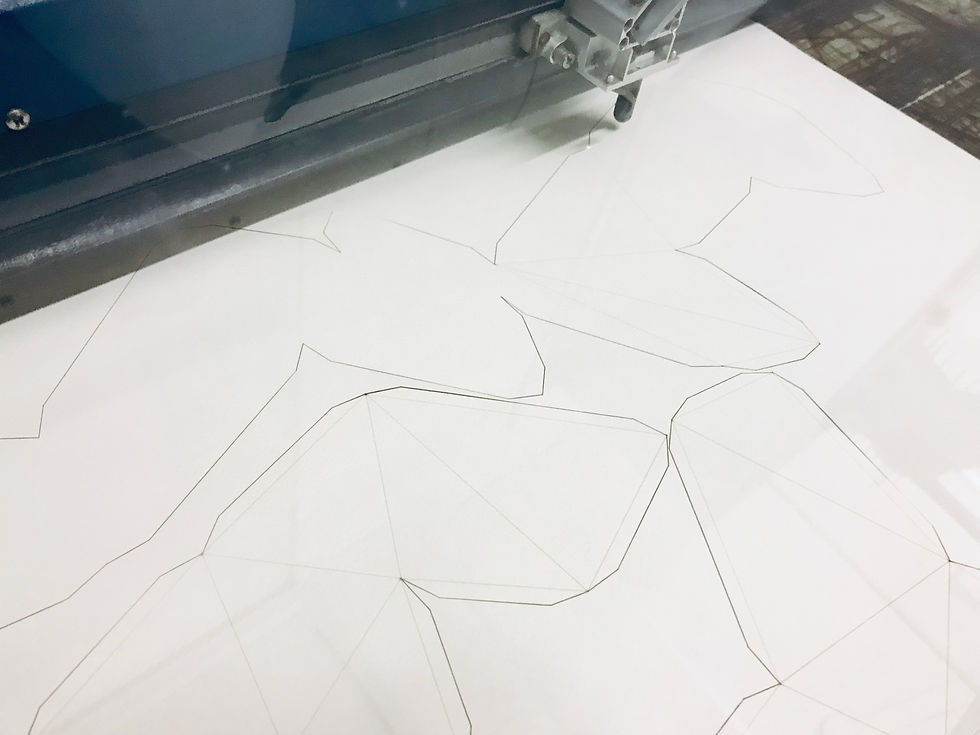
I converted the mesh to a polysurface, and unrolled all the triangles into one plane. I did a fair amount of editing to make sure none of the triangles overlapped, but I kept large chunks together to make fabrication easier. Once I had these outlines, I used the grasshopper script from our canvas site to create tabs on the edges of the triangles.

Then it was off to the laser cutter. I actually make two copies of the bowl, each fit on two sheets of poster size watercolor paper. I figured a stiffer and thicker paper would be ideal for making a 3 dimensional object. This photo is of the white paper version, which I ended up tearing on my first try folding and gluing all the pieces together. I used a low power setting on the laser to score a line where folds would happen, but I used too high a setting and the paper would tear along these lines. I went with half the power for the black version and didn't run into this issue. I folded each section of the bowl together and hot-glued the corresponding tabs together always on the inside of the bowl.
I also had planned to make a frame for the bowl in Slicer so that it would be able to hold more weight inside. I scaled down the model of the entire bowl before bringing it into slicer so that this frame would fit inside the paper shell of triangles. I laser cut these cross sections out of thin solid cardboard and assembled it. But I couldn't get the mesh triangles to fit around it. The tabs would stick too far down into the frame and it would bulge away, distorting the triangles. Eventually I decided to finish the bowl without the frame inside.

I'm quite pleased with the end result. It actually is strong enough to hold small object (like pieces of fruit or random things on my desk) even without the frame. Some of the hot glue is visible on the edges, but the large majority is hidden inside, leaving only the triangles on the outside.


The other requirement of this lab was to 3d print three objects. First I attempted to print a small version of this bowl. But the model must not have been watertight, as the printer filled in the center of the bowl. I tried this a second time after I though I had fixed the issue, bu the result was the same.
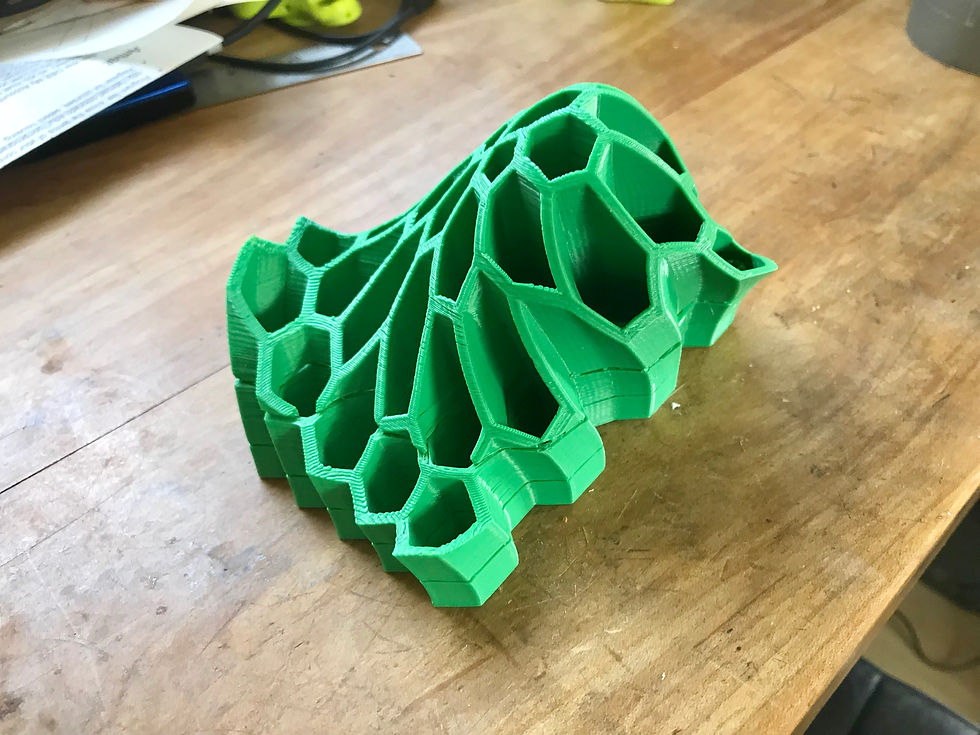
My second object was downloaded from Thingiverse. It's a pencil holder made from a twisted pattern of hexagons. When its full of pens and pencils they all spiral around each other. It's very functional as well as artistic. I think I'll make a rhino model inspired by this soon.
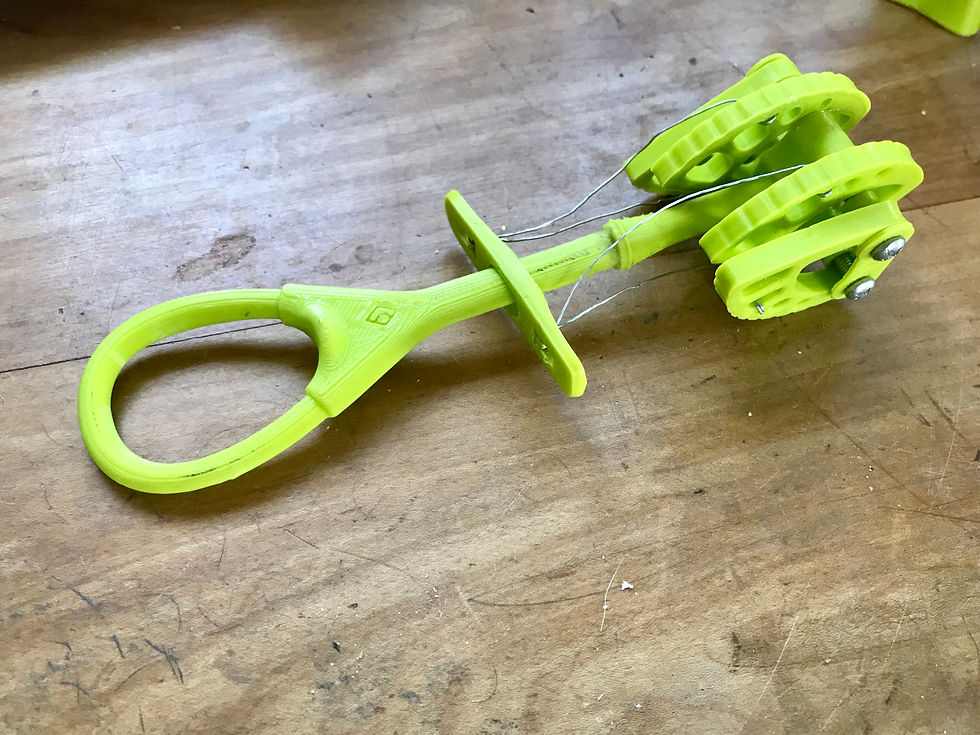
This final 3d printed piece is a number 2 climbing cam. I did the 3d modeling for this is in a past semester when I was taking CAD for engineers. I created it in Solidworks using prices measurements from a real product. I still had all the files, and decided that it would be cool to actually 3d print it. Only one part required some redesigning, the finger grip. I made a flat bottom for it so it would print better. Then, once I had all the pieces, I assembled it using some screws and wire so that it would function like an actual cam.


Comments